In this step by step tutorial we will see how to integrate Jquery Lightbox into our website.For this tutorial I will use Jquery Lightbox created by "Leandro Vieira Pinho". This plugin is inspired and based on Lightbox created by "Lokesh Dhakar". Jquery Lightbox is very beautiful and powerful plug-in to create image galleries with image overlay effects.
Step1: Download Jquery Lightbox. To download go to http://avioli.github.io/jquery-lightbox/.
Step2: Extract the files from the ZIP/TAR folder. Now you will see these files in the folder.

Step3: Create a new website folder and paste css, images, js and photos folders from the extracted folder to website folder.

Step4: Create a new Index.html page in folder.
Step5: Now add reference to JQUERY and CSS files. Add these lines of code between <head></head> tags.
Note: All these files are already there in css and js folders.
<link rel="stylesheet" type="text/css" href="css/jquery.lightbox.css" media="screen" />
<script type="text/javascript" src="js/jquery.1.2.3.js"></script>
<script type="text/javascript" src="js/jquery.lightbox.min.js"></script>
|
Step6: Add Image code and Lightbox code to your html page. Add these lines of code between <body></body> tags.
<div id="gallery">
<ul>
<li><a href="photos/image1.jpg" title="Utilize a flexibilidade dos seletores da jQuery e crie um grupo de imagens como desejar. $('#gallery').lightBox();">
<img src="photos/thumb_image1.jpg" width="72" height="72" alt="" />
</a></li>
<li><a href="photos/image2.jpg" title="Utilize a flexibilidade dos seletores da jQuery e crie um grupo de imagens como desejar. $('#gallery a').lightBox();">
<img src="photos/thumb_image2.jpg" width="72" height="72" alt="" />
</a></li>
<li><a href="photos/image3.jpg" title="Utilize a flexibilidade dos seletores da jQuery e crie um grupo de imagens como desejar. $('#gallery a').lightBox();">
<img src="photos/thumb_image3.jpg" width="72" height="72" alt="" />
</a></li>
<li><a href="photos/image4.jpg" title="Utilize a flexibilidade dos seletores da jQuery e crie um grupo de imagens como desejar. $('#gallery a').lightBox();">
<img src="photos/thumb_image4.jpg" width="72" height="72" alt="" />
</a></li>
<li><a href="photos/image5.jpg" title="Utilize a flexibilidade dos seletores da jQuery e crie um grupo de imagens como desejar. $('#gallery a').lightBox();">
<img src="photos/thumb_image5.jpg" width="72" height="72" alt="" />
</a></li>
</ul>
</div>
|
Step7: Last not least Initiate Jquery lightbox. Add these lines just above </body> tag.
<script type="text/javascript">
$(function () {
$('#gallery a').lightBox();
});
</script>
|
Step8: Your Lightbox is ready to use if you run your page you will see lightbox like this:
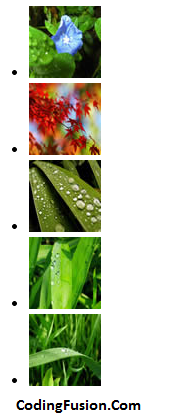
You can clearly figure that it is not similar to the example shown on original Jquery Lightbox website to fix this issue we have to some CSS.
Step9: Add these lines between <head></head> tags of your Index.html page.
<style type="text/css">
#gallery
{
background-color: #444;
padding: 10px;
width: 520px;
}
#gallery ul
{
list-style: none;
}
#gallery ul li
{
display: inline;
}
#gallery ul img
{
border: 5px solid #3e3e3e;
border-width: 5px 5px 20px;
}
#gallery ul a:hover img
{
border: 5px solid #fff;
border-width: 5px 5px 20px;
color: #fff;
}
#gallery ul a:hover
{
color: #fff;
}
</style>
|
Step10: Output:
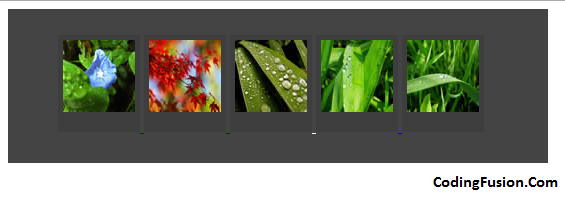
Congratulations you have successfully implemented Jquery Lightbox in your website.
Disclaimer: I would like to thanks both "Lokesh Dhakar" and "Leandro Vieira Pinho" for creating Lightbox. To use Jquery plugin created by "Leandro Vieira Pinho" is my personnel choice and I am not forcing you to use the same. You are free to choose any lightbox created by " Lokesh Dhakar" or by "Leandro Vieira Pinho".