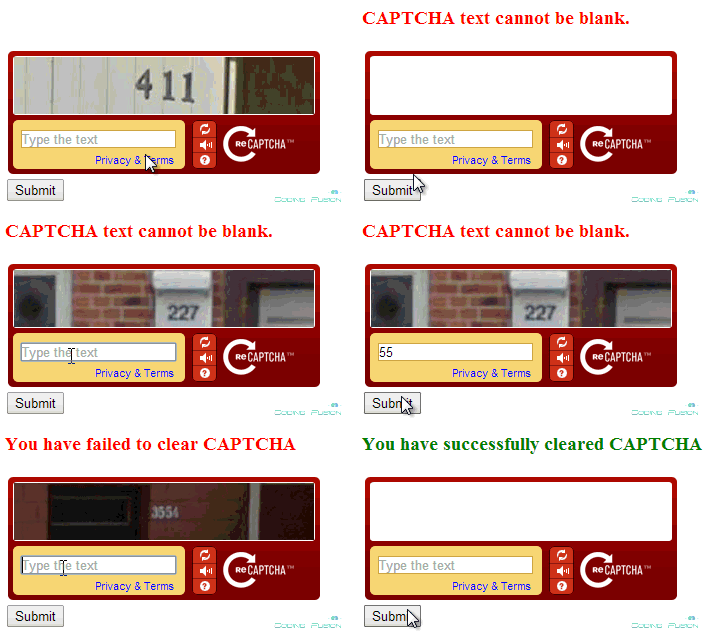
In this article we will learn how to use google's reCaptcha by adding reCaptcha DLL and by using Nuget package in asp .net. CAPTCHA is abbriviated as "Completely Automated Public Turing test to tell Computers and Humans Apart" it is a test to distinguish between human and automatic bots.
The main aim of the CAPTCHA is to fight and stop SPAM. There are many CAPTCHA techniques available over the internet you can use one of these or you can create your own custom CAPTCHA. Some of the common CAPTCHA's are Random Words CAPTCHA, CAPTCHA with arithmetic tests etc. ReCaptcha is created by GOOGLE and it is tested and trusted over the years.
In this tutorial we will use reCaptcha by following techniques:
1. Adding Reference to reCaptcha DLL into asp .net application.
2. Using reCaptcha component into asp .net application.
Method1: By adding Reference to reCaptcha DLL into asp .net application.
Step1: Download reCaptcha DLL. You can download latest reCaptcha DLL from this link:
https://code.google.com/p/recaptcha/downloads/list?q=label:aspnetlib-Latest
Step2: Unzip the archived folder. After unzipping the archived folder you will see following files:

Step3: Create a new asp .net website.
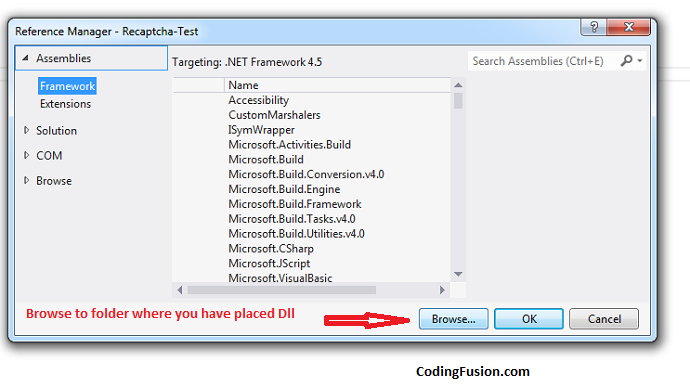
Step4: Add refrence to reCaptcha DLL.
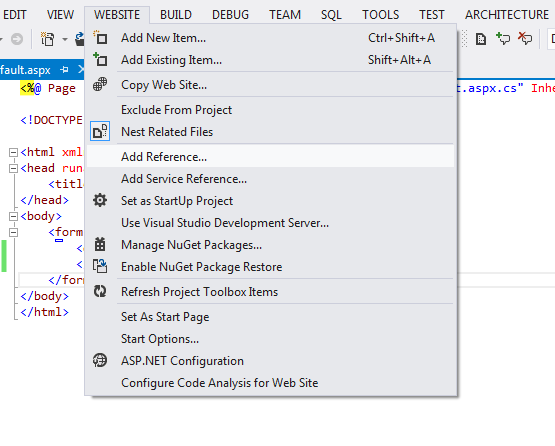
Browse reCaptcha DLL
Select DLL File
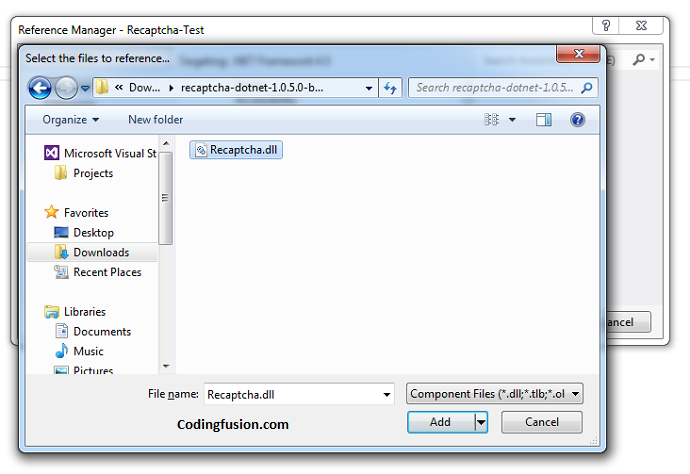
Step5: Register reCaptcha to asp .net webpage by adding Tagprefix.
<%@ Register TagPrefix="recaptcha" Namespace="Recaptcha" Assembly="Recaptcha" %>
Step5: Add reCaptcha Code into webpage:
Here Label is used to just print success and failure messages and Button is used to write validation code.
Code Behid:
protected void btnSubmit_Click(object sender, EventArgs e)
    {
        if (Page.IsValid)
        {
            lblResult.Text = "You Got It!";
            lblResult.ForeColor = Color.Green;
        }
        else
        {
            lblResult.Text = "Incorrect";
            lblResult.ForeColor = Color.Red;
        }
    }
Step6: Get your reCaptcha Keys:
https://www.google.com/recaptcha/admin#whyrecaptcha
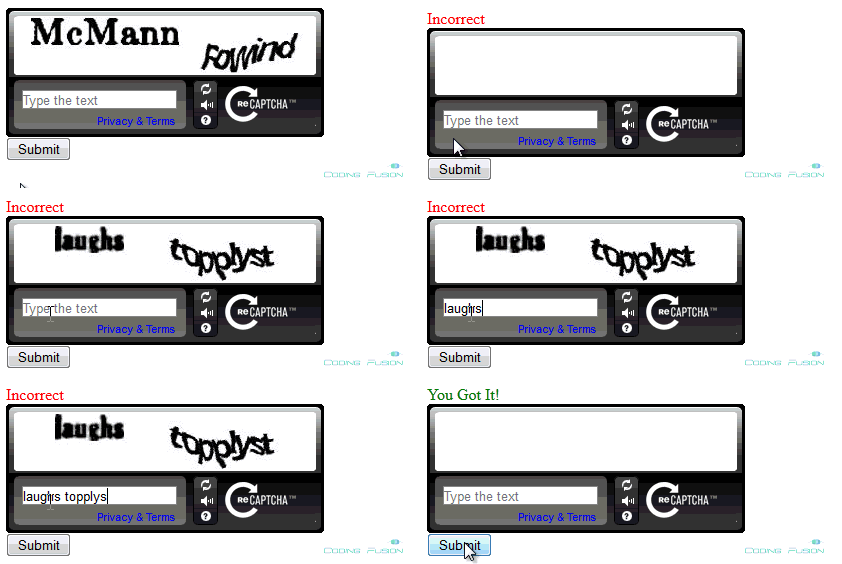
Final Output:
Method 2: By using Nuget package
Step1: Create a new asp .net website.
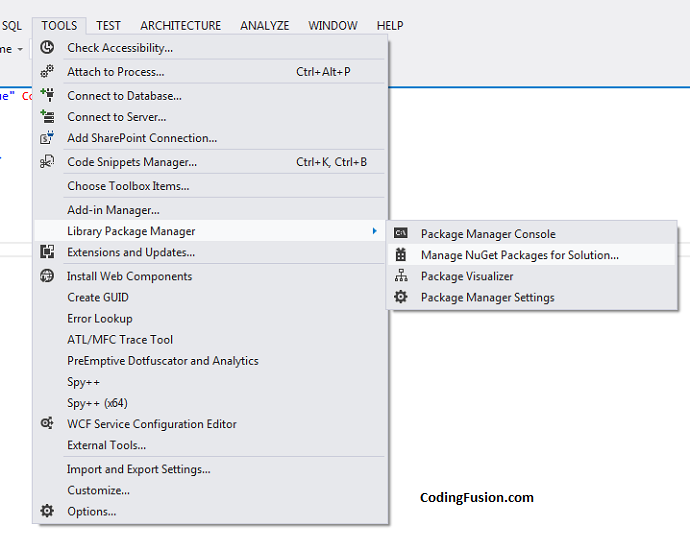
Step2: Go to Tools=> Library Package Manger=>Click on Manage NuGet Packages for Solution
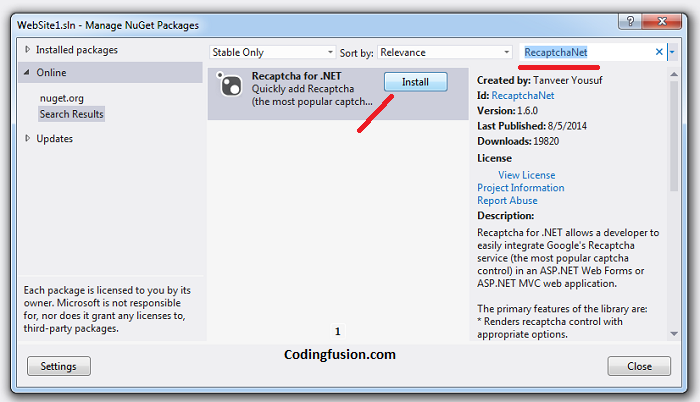
Step3: Search for RecaptchaNet on the search bar and Install the package.
Step4: After successful installation reCaptcha nuget package will update your web.config file with necessary code.
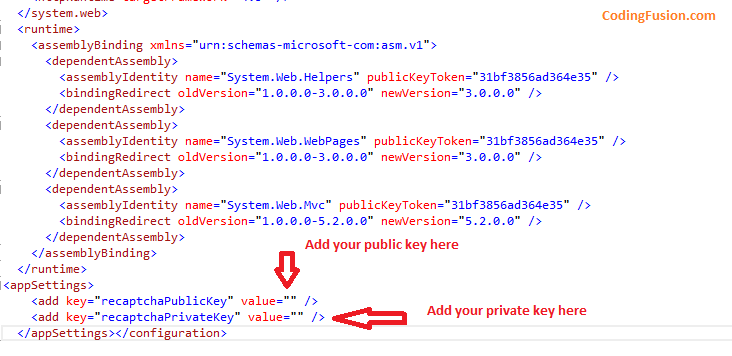
Step5: Get your reCaptcha Keys and update into web.config file as shown in the above image:
https://www.google.com/recaptcha/admin#whyrecaptcha
Step6: Register reCaptcha control to your webpage.
<%@ Register Assembly="Recaptcha.Web" Namespace="Recaptcha.Web.UI.Controls" TagPrefix="cc1" %>
Step5: Add reCaptcha Code into webpage:
Here Label is used to just print success and failure messages and Button is used to write validation code.
CodeBehind:
//--- Add Namespace using Recaptcha.Web;
  protected void btnFormSubmit_Click(object sender, EventArgs e)
    {
        if (String.IsNullOrEmpty(Recaptcha1.Response))
        {//--- If no text is inserted
            lblResponse.Text = "CAPTCHA text cannot be blank.";
            lblResponse.ForeColor = Color.Red;
        }
        else
        {
            RecaptchaVerificationResult result = Recaptcha1.Verify();

            if (result == RecaptchaVerificationResult.Success)
            {//---- If text entered matched with captcha
                lblResponse.Text = "You have successfully cleared CAPTCHA";
                lblResponse.ForeColor = Color.Green;
            }
            if (result == RecaptchaVerificationResult.IncorrectCaptchaSolution)
            {//---- If text entered not matched with captcha
                lblResponse.Text = "You have failed to clear CAPTCHA";
                lblResponse.ForeColor = Color.Red;
            }

        }
    }
Final output:
